A few months ago, I had stumbled across what appeared to be 1/12 scale Splatoon dolls. Although Nintendo never sold any figures/dolls aside from the Bandai Dress-Up figures as well as the Figmas . . But those were barely customizable.
Any searches online to find out where these dolls came from yielded no results.. that was until I found the source of these dolls being the Chinese (and sometimes Japanese) Splatoon community. In fact, there was an entire community within the community for these specific dolls.
At first, I had thought they were made by one person. But after talking to a few people (with very very poor Google translated Chinese) I was able to get all the information about these dolls and how I could make one myself.
At first I wasn't sure what character to make, if I were going to be making a doll of my own. My inkling persona was way too complex for my first custom doll . . . but then it hit me.
I should immortalize my boyfriend as a doll! And be the only person on the planet to have a doll of Aloha.
So, this page will be documenting the process of building my boyfriend as a doll!
As of writing this, he's about 75% done. So I will post the progress pictures I have taken along the way. And maybe after he's done, I can share the adventures we go on together!
So for starters, the hardest part of this whole journey was figuring out exactly what dolls these were. Were they completely custom, or were they built upon an existing sculpt?
Over many MANY days of reverse image searching, talking to Chinese artists, I had found two listings on the Chinese second-hand marketplace Xianyu, for Splatoon faceplates for both inklings and octolings!
It seems that there were two main artist's sculpts that people were using for their dolls. Unfortunately I couldn't tell you their names, because translators always spit out different results. So, if you want to make a doll of your own, you'll have to find them yourself.
Considering Chinese websites are very strict about who is using their service, figuring out how to get these dolls from over there, to over here, was a pain IN THE ASS. Not only that, but it seemed BOTH of the artists who made these faceplates were out of stock.
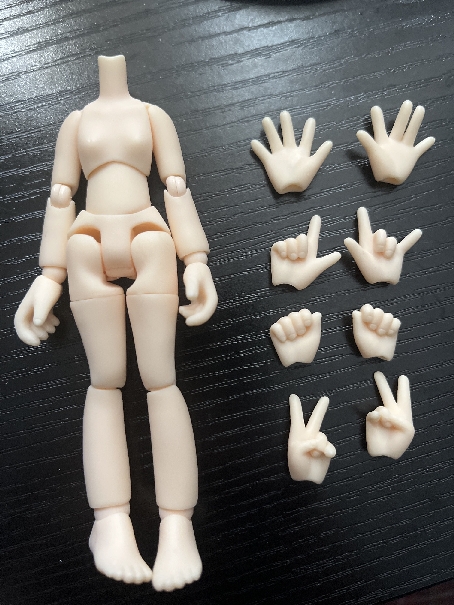
So, rewind a bit. It seems the faceplates were a completely custom sculpt made to fit onto a nendoroid head and neck. There seemed to be two different bodies people were using. Azone's Picco Neemo D, and some sort of Piccodo doll. The Piccodo body had joints at only the shoulders and hips though, so I decided to go for the Azone doll because it had full range of motion, as well as swappable hands.
And here's my second hill, and arguably the steepest one in this entire journey. Azone stopped manufacturing the male version of this specific sculpt. That means I was going to have to find them second-hand.
Ebay? Nothing. Mercari? Nothing. Facebook Marketplace? Nothing. So we can assume no one in the United States was selling this doll.
I had to resort to using a proxy to buy from overseas. However, I wasn't able to buy these dolls on the Xianyu website because I don't know Chinese and I couldn't figure out the Chinese translation for their names. And so, I had to ship from Japan. Which is extremely expensive as of now.
But eventually, I had gotten a body.
I payed for overseas shipping, and it arrived. Only for me to realize. I was sent a female body. With boobs. I could not return it because I stupidly didn't pay for protection. That means if I was sent the wrong item I couldn't just exchange it. SO I had to make do.
Sigh. Well, luckily these dolls aren't all that expensive (minus the shipping). They were mass manufactured and made with PVC, which was an extremely soft plastic and easy to modify. So I grabbed a blade and preformed top surgery on the doll.
It was pretty easy to get one of the boobs off, and things were looking great! That was until . . I accidentally snapped the left arm while holding the torso in place.
In short, I was not happy. So what was I gonna do?
Well, this was shortly after my 19th birthday, which means I had a couple hundred dollars to spare. So I ended up just sucking it up and attempting to find another doll.
But it seemed NO ONE had this specific male sculpt for a fair price. The cheapest I could find it for was 30$. But fuck it, it's worth it for my boyfriend. So I bought it. and it arrived at the warehouse. As of writing this, it's still in transit. So we hope that this time, nothing is wrong with the doll. Because I paid an extra 25$ shipping.
Meanwhile, I had actually gotten a friend from China to help me with the whole Xianyu thing. I'll spare the details and just say that we ended up getting in contact with a seller and had ended up reserving a faceplate as well as a hairpiece for myself! Score!
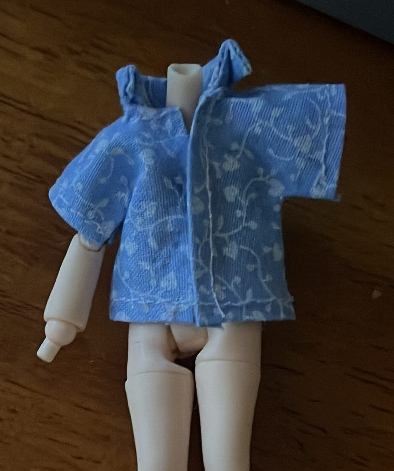
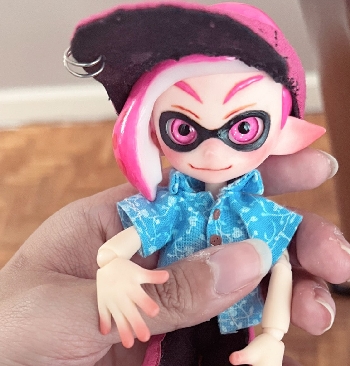
While waiting for the face, hair, and the new body to ship, I started working on the clothes using the broken, armless doll as the mannequin.
Because of the small scale, the button-up was a challenge and a half. There were really no sewing patterns for button-ups in the 1/12th scale, so I had to heavily modify an existing Nendoroid pattern to fit the Azone body. Not only that, but because of the intricate design on the Aloha Shirt, I had to settle for patterned fabric that only resembled the design. I was NOT about to paint all those tiny details. Maybe in the future, if I figure out how.
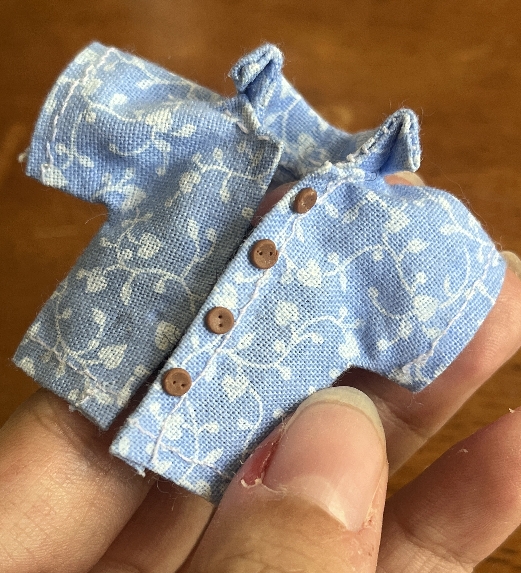
After three failed attempts, I had finally made a shirt I was happy with.
Then, I sculpted TINY buttons using brown polymer clay, and poked the button holes with a sewing needle. I was originally going to actually sew them onto the shirt for the extra detail, but they were just TOO SMALL to do anything with. So I just used tacky glue to attach them.
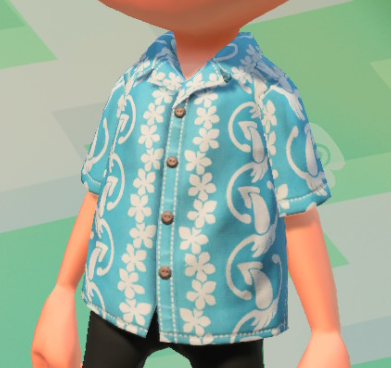
For reference, the in-game shirt is on the right. I could not for the life of me figure out how to do the collar, but I have more than enough leftover fabric to make another shirt in the future if I so feel like it.
To close the shirt, because I couldn't sew actual tiny button holes, I just put two pieces of velcrow overlapping the edges on the inside. Nice and hidden.
Now for the pants, I thought it was gonna be easy. It wasn't.
The classic shorts resemble bike shorts, which are skin tight. I happened to have fabric which was super stretchy and of similar material as bike shorts, but sewing at such a tiny scale was impossible. Especially considering the stretchiness vs my sewing machine, which was pretty big.
I ended up opting for jersey knit instead, which was thicker and easier to sew but still stretchy. I was happy with the result.
For the pink stripes on the side, I literally just took strips of fabric and went along the edges with fabric fusion so they didn't fray, then glued them down on the pants while it was on the doll itself, to make sure it wouldn't pull on the fabric when it stretches.
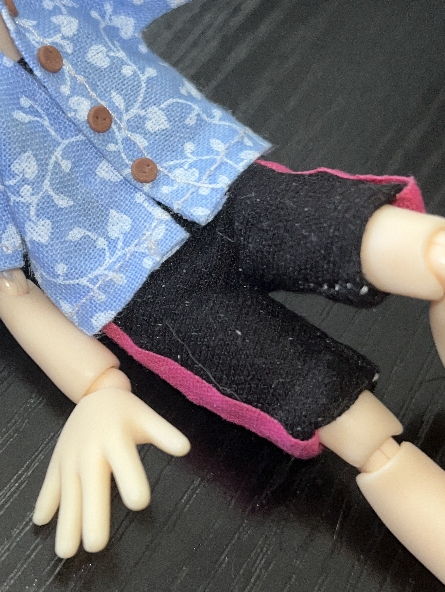
Because of how I had to sew the pants, there was a seam running down the outsides of the legs. That means I wouldn't have been able to just paint over it. I haven't gotten to it yet but when I fix up all the little details, I'll be sure to glue the edges flat so it looks like a solid piece.
Now for the shoes, oh the dreaded yet absolutely fun little shoes.
At first I thought I could actually sew little sneakers with fabric and paint on the details, but considering how small of a scale im working on, that's nearly impossible. I wanted the shoes to actually function as shoes that could be slipped on and off. After multiple attempts at making doll shoes "correctly" I just gave up and opted for the "figurine" version instead. That being sculpting the shoes to be individual parts that could be swapped out with the feet. Meaning the shoe was solid and the ankle joint would attach directly to it.
I'm awful with clay, so I didn't do that. Instead, I ripped the model straight from the game and 3d printed it. I used clay to plug the hole and then used the joints themself to poke holes in the clay in order for it to be a perfect fit.
Now, because polymer clay has to be heated at extremely high temperatures in order to harden, and PLA melts at about 60 degrees, I couldn't just pop them in the oven. I had to opt for paper clay, which was a soft, light, air drying clay. I have never used it before, so it was a new experience for me.
And I'm glad I took that risk because paper clay is. Wow, amazing. I love it. It's so easy to use compared to polymer clay. It has a nice texture, and it sands so cleanly. Creating smooth surfaces is so simple, and it absolutely helped with filling the print lines and adding small details that my printer couldn't capture.
I eventually came up with a shoe-looking blob of PLA and paper clay.
I got ahead of myself and didn't take a picture of what it looked like before I began to paint it. But basically, I sketched out where I wanted everything to go with a pencil and then painted ontop of it.
Because it's such a small scale, I didn't really need any expensive paints. I used "Top Notch" (it's not top notch because it sucks, but its good for painting small things) because they were on sale at Joann, and I got like 9 bottles for 6 bucks, hah!
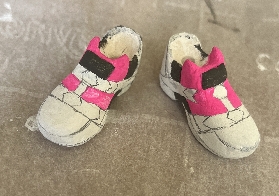
When painting, don't glob on a whole bunch at once. It's gonna take a lot of thin coats in order to cover the surface. If you slap on a bunch at once it ends up lookin gross. Just a tip if you ever want to paint miniatures.
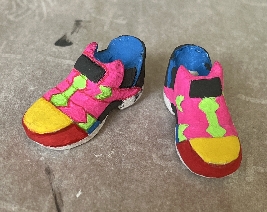
I realized the shoes lacked depth, so I went in with colored pencils and traced along the lines to give it more detail. The shoe on the right is before, left is after.
I sealed the shoes with a matte sealer before I went over the colored bits with a gloss to give it that plasticy shine the shoes seem to have.
After the "body" of the shoes were done, I had to think of how I was going to do the little loops near the ankles. I ended up folding over some red fabric and then gluing it to the insides, using the ankle joint to push it down while it dried. Then I ended up with this.
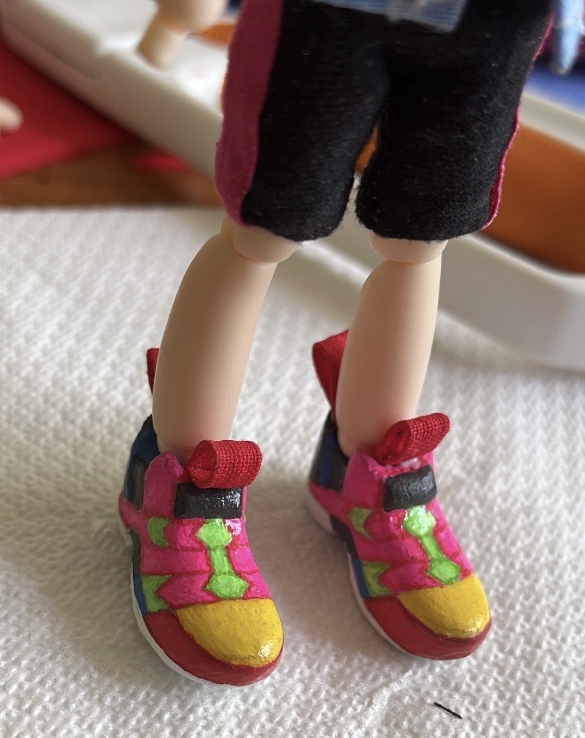
Because I have an awful hand, I wasn't even going to ATTEMPT to paint on the little Takoroka logos on the front and back of the shoes. I figured in the future I could print out little stickers instead, but I don't have transparent sticker paper right now so i'm just gonna leave it like this.
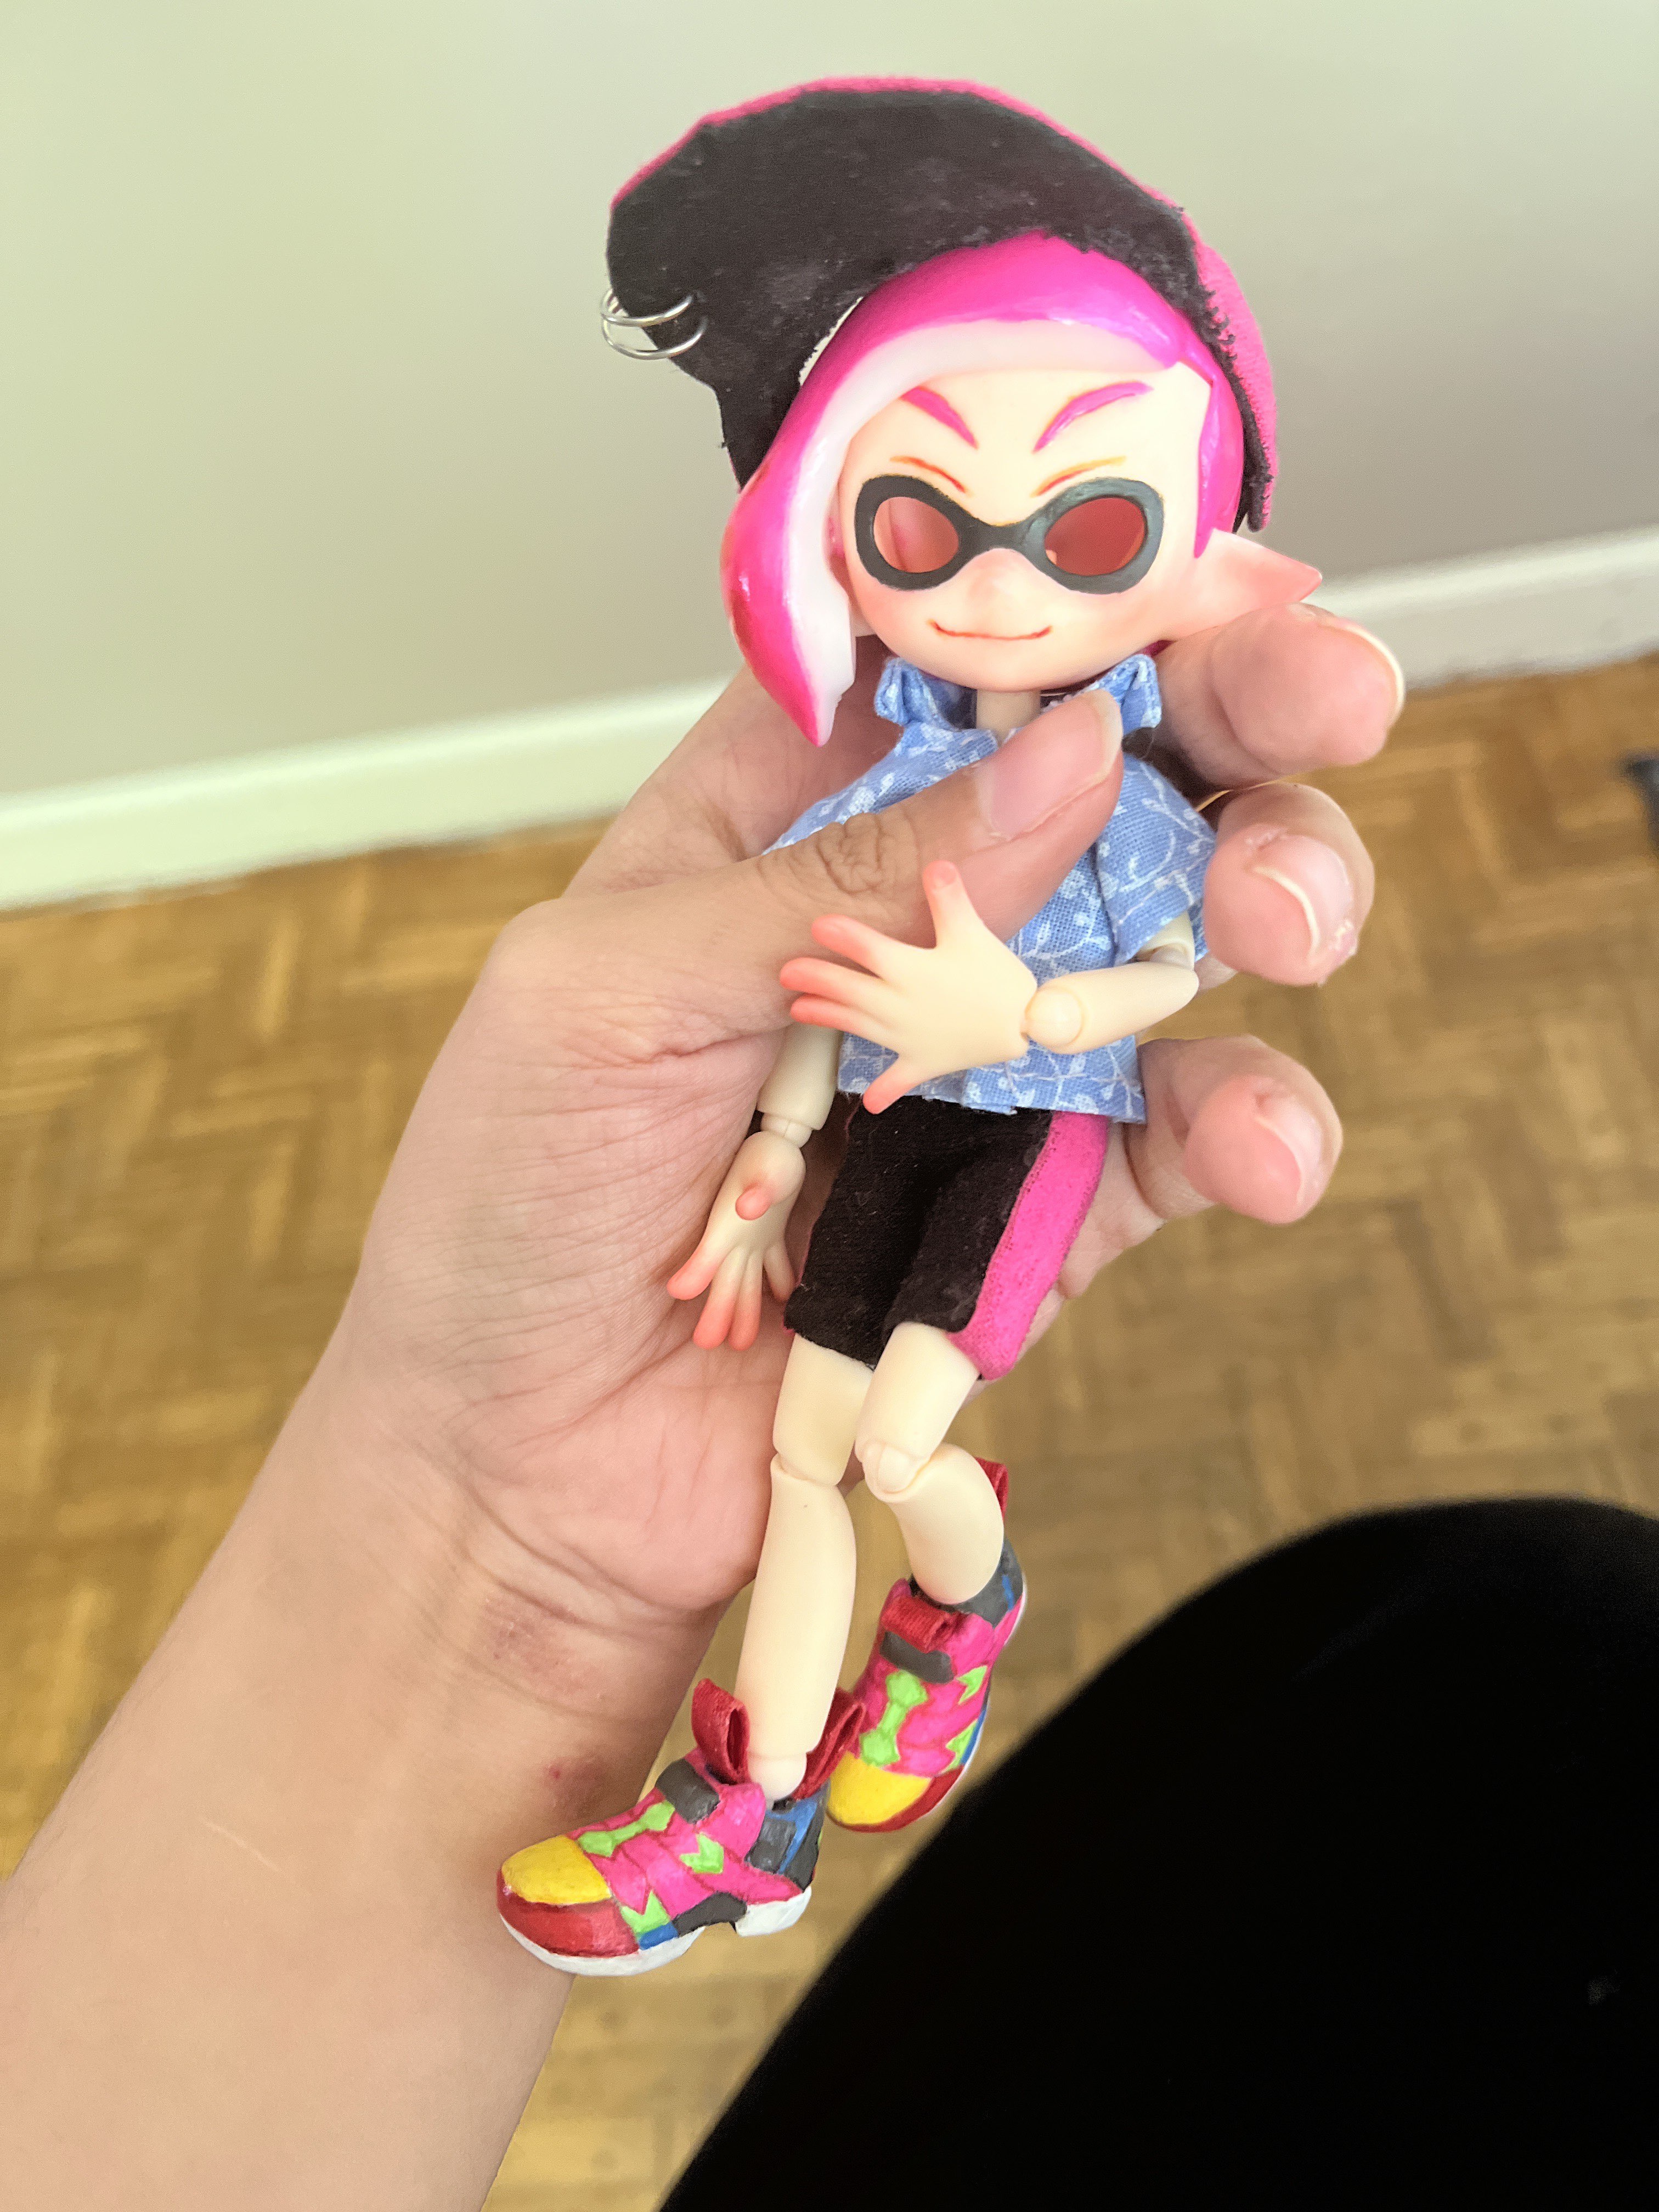
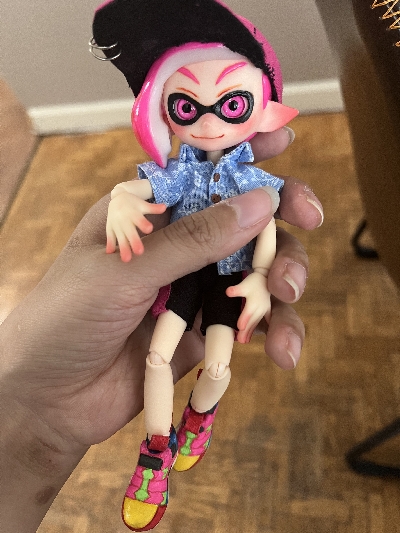
This is what he looks like all put together.
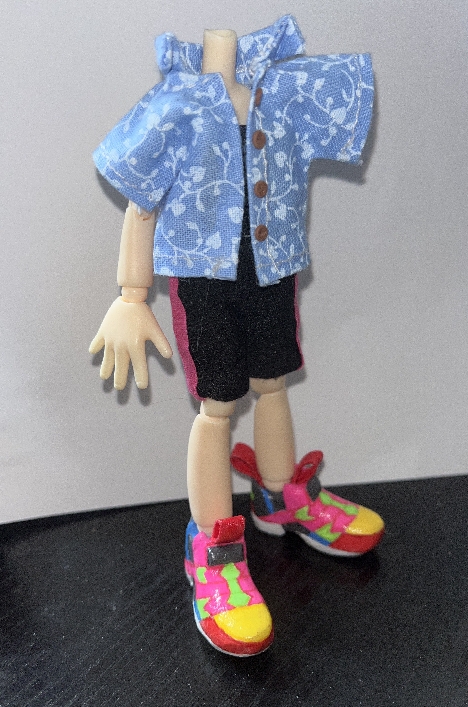
A little ridiculous without his left arm and a head, but I promise he'll be done soon!
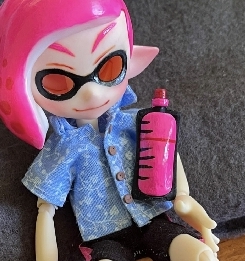
Considering at this point I don't have a head to measure for his visor, there's not much left to work on at the moment. But just for fun, I decided to 3d print an ink tank.
I used paper clay, again, to mold the actual ink sack. I haven't painted it yet because I'm gonna wait until I paint his hair so the ink colors match perfectly and I dont have to mix paints a billion times to get it the right color.
I'm not sure how I'll attach the tank to his body when it's done, but I'll find a way.
As of writing this, this is where I left off. I hope you enjoyed reading about the making of my doll, and I hope you're just as excited as I am to see it finished!
(I'm so impatient)
Update! I got a new body in, and actually realized that the male version of the body is slightly bigger than the female version. I mean, that makes sense. but in the product images on Azone's website, it looks almost identical.
It's no biggie, but I realized that the hands are way bigger which means I can't use the various hand replacements I got along with the female body. Also, the shoes look sort of small.
If you've played Splatoon, you'd know that their shoes tend to be much larger than their actual feet. I tried to repliate that with the doll.. but once moved to the larger male version it just looks proportionate. Ahhhh! I'll probably remake them in the future, but it's not that big of a deal either.
Aaaand guess what else came in! Literally everything else. The head, the hair, and I actually got a bit carried away with Splatoon miniatures on Xianyu, so I got a few extra things!
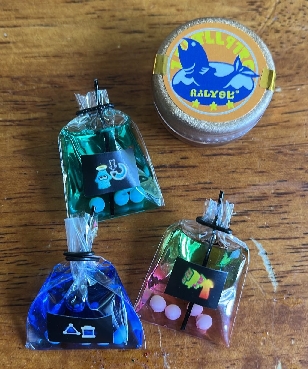
Tiny little ability drinks and a salmon roe jar. The jar also opens and you can take the eggs out but I didn't get a pic of that oops.
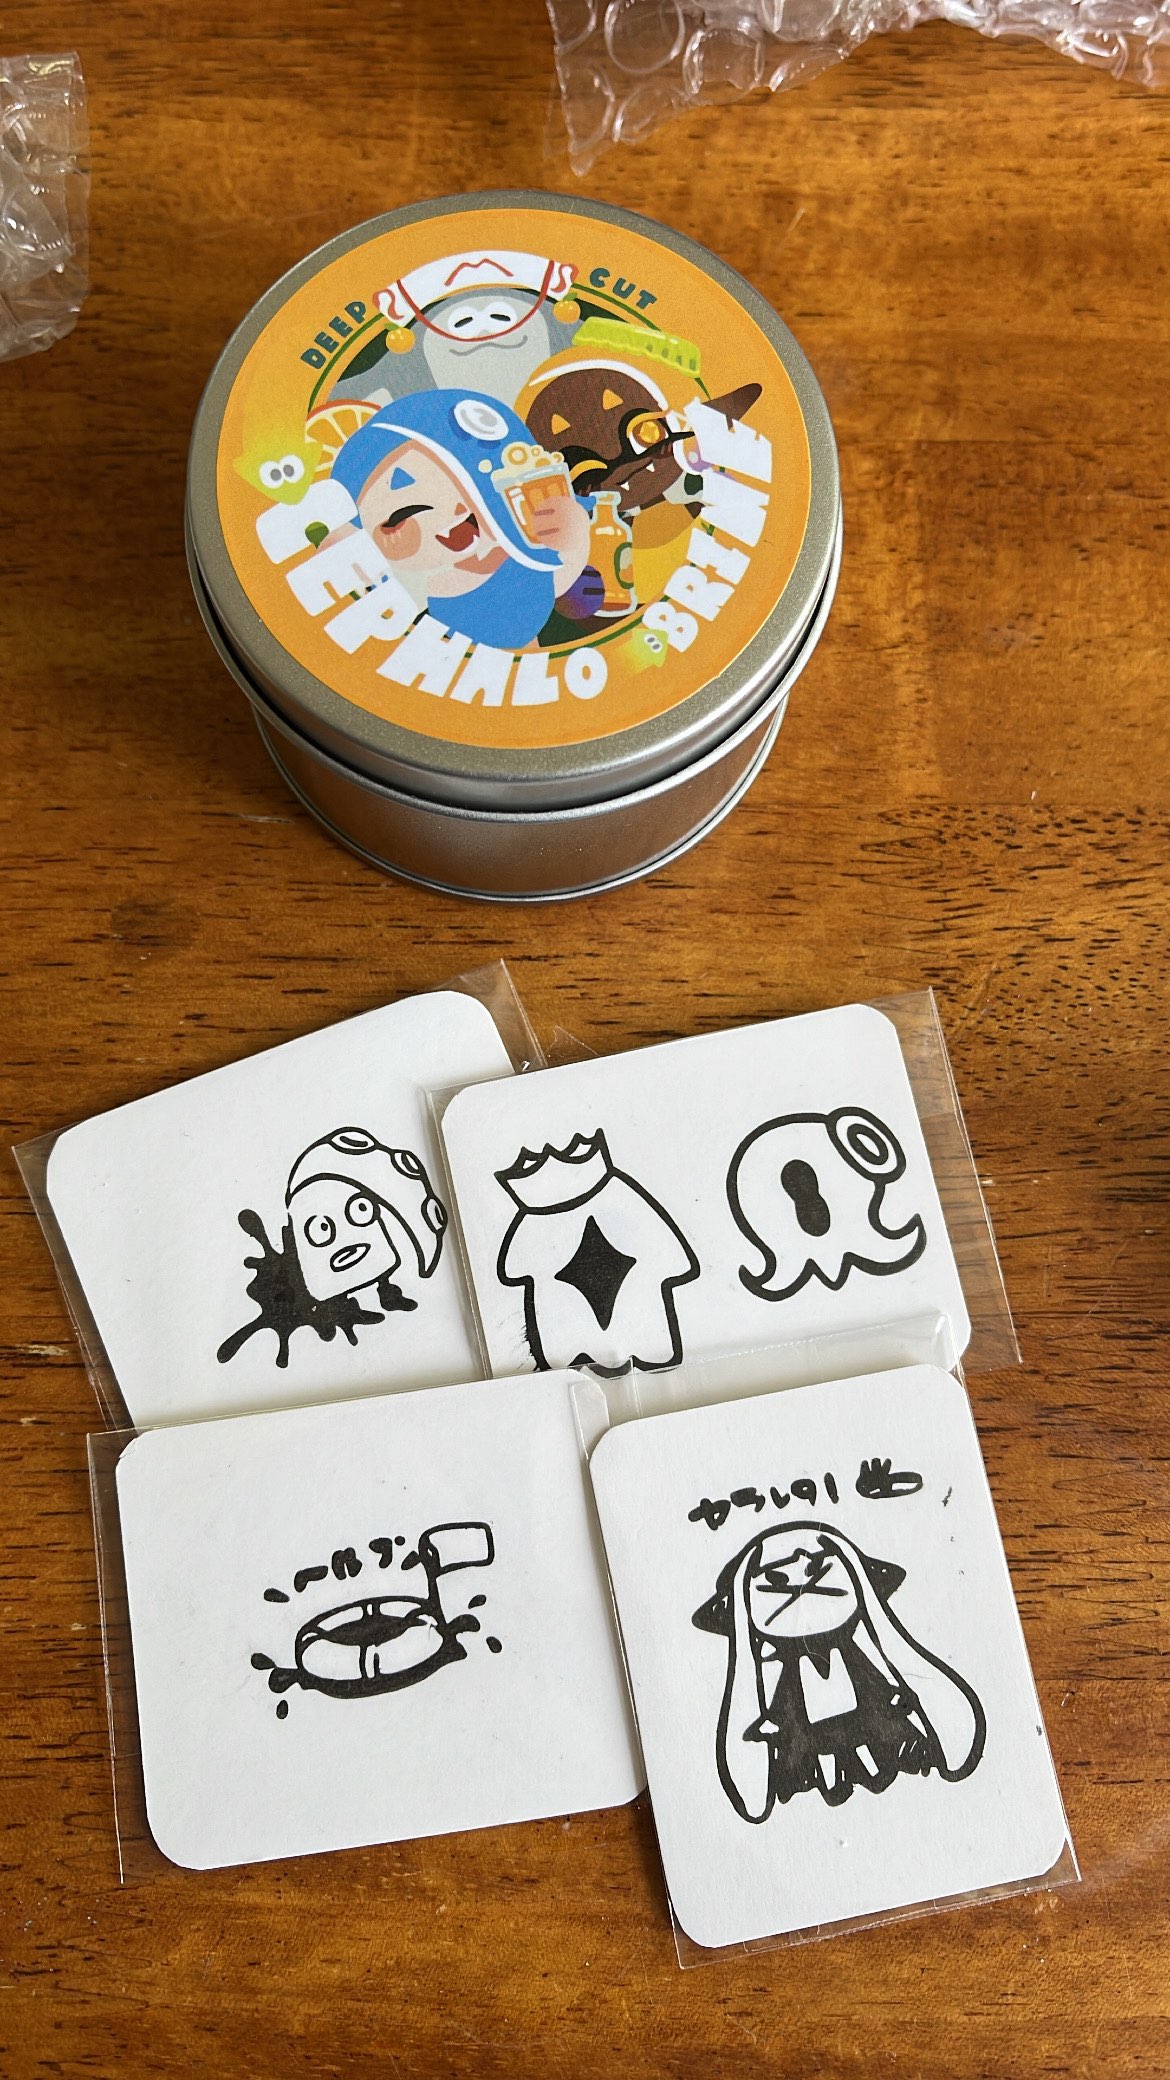
The hair actually came in the tin jar with the artist's name (presumably) along with some adorable freebie stickers!
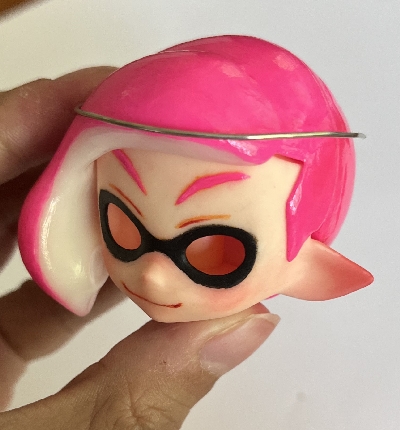
Anyway, here's the head with the front hairpiece on. I didn't include the other pieces in the picture because... they didn't fit! The hairpiece wasn't designed for the face shell i got, but because the hair is raw resin I was able to sand it down with a dremel and made it fit. (don't worry, the artist recommended grinding it down if it didn't fit)
aaaaand now it fits!
After that, I got to work on the face-up. I've never done a doll face-up before, so it was a new experience for me. I watched like 5 different tutorials to be sure I knew what I was doing.
I primed it with Mr Super Clear (so the pencil could have something to hold onto) then sketched out everything with orange watercolor pencils (watercolored because they're super soft and pigmented).
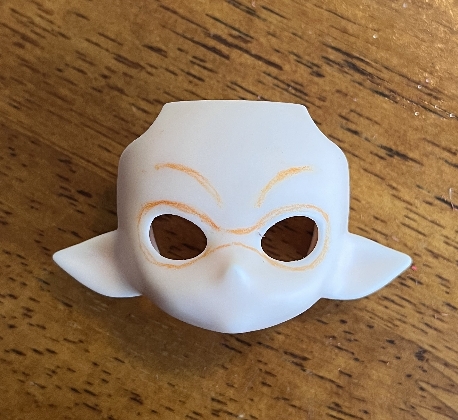
Now the eyebrows here were temporary because I wasn't really feeling the shape. Aloha's eyebrows are super thin and usually up higher...? Not sure how exactly to describe it lol
I actually took pictures of the sketch and flipped it on my phone just to make sure everything was symmetrical. Once I had gotten to the point I was happy, I colored in the eye mask with black and then painted over it with acrylic paint.
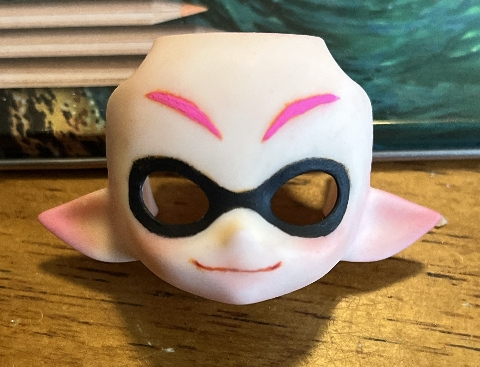
The mouth was done with acrylic paint, I had to use an extremely small brush and made many attempts. Even now it's a bit asymetrical, but most mouths arent perfect so it didnt bother me too much.
To breathe life into the resin, I added some blush using soft pastels. Basically, you'll have to use a blade to shave off dust from the stick of pastel and then use a brush to dab it on. Since you can only put on so much at once, I had to seal it with MSC between each layer before I was able to build up enough blush.
(In retrospect, I think I ended up going a bit overboard with the blush. I ended up missing sections of the ear when I sprayed sealant, so pieces ended up chipping off. I had to go over it multiple times with a new layer of blush to hide the chipping. Grr. Thankfully, because the faceplate is removable, if I ever need to redo it in the future, I can just swap it out with another one!)
I also ended up blushing the tips of the fingers. Some inklings in-game have a soft gradient on their fingers, usually their ink color but sometimes not. I wanted to replicate it rather than keep his fingers as plain base color though.
Soooo onto the hair pieces!

It took multiple coats of paint for it to be one solid color, you can see how the light goes right through the resin and you can see the whiteness underneath. Yeah, it took soooo many coats.
Genuinely glad that the ponytail was a separate piece than the back hair piece, it made it easier to paint.
You can't see it in the pic, but the base of the ponytail has a little band around it which was . kind of difficult to paint its correct color (black) since its so small and close to the pink.
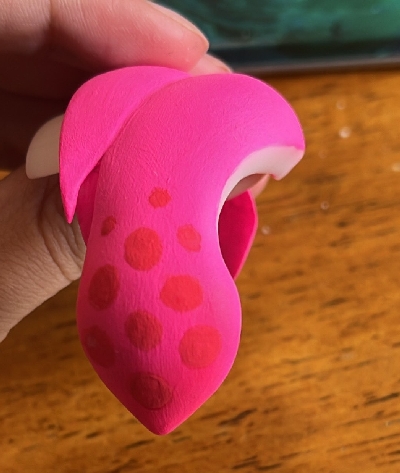
For the end of the tentacles I wasn't sure what color to go with for the spots.
In-game, it's always a lighter color. But even in the colored versions of the manga, it's dark. Not sure why that choice was made. I thought it would look more accurate to Aloha if I went with dark though.
And then finally once I was done painting the hair, I went over the whole thing with DecoArt Triple Thick gloss glaze to actually make it look like wet tentacles.
It actually took multiple coats and it still wasn't as shiny as I would've liked it so at that point I just poured a thick layer ontop lol
After I finished the hair, there was only two things left to do. The hat and the eyes.
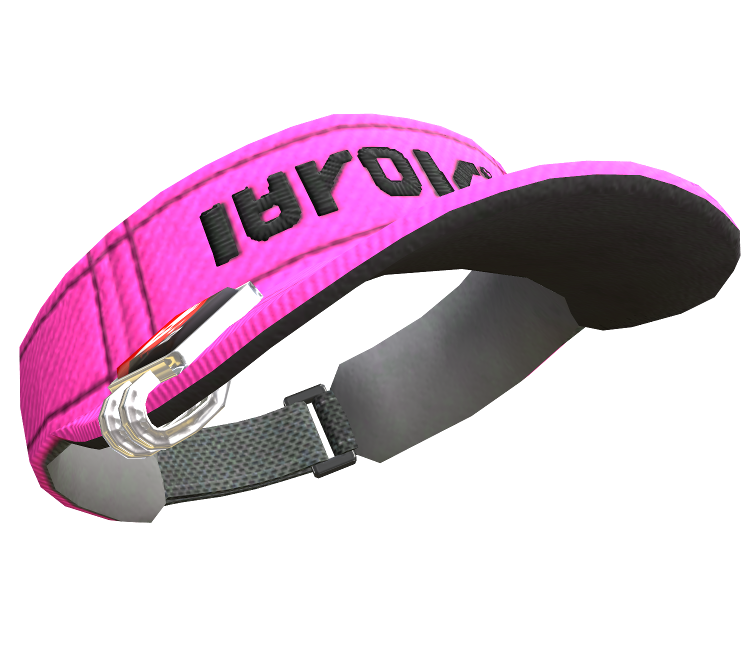
For the hat, I wasn't about to trial and error to get a brim to fit so I actually just bent a wire along where it wanted it to sit so I know the curve was just right. Then I traced that curve onto paper and drew the shape of the brim.
Making the hat wasn't that big of a challenge. I used cardstock on the inside of the brim to keep it stiff, then attached the brim to a band using the worlds most annoying stitch which I haven't photographed. Just trust me. I had to hand stitch the whole thing and it took longer than it should've.
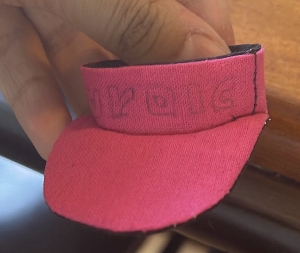
I wasn't actually happy with how this hat looked. The brim was too long and the band was too tall. Considering how fast it took me to make it, I just ended up making a new one.
I didn't get a picture of the new hat , but you can see it in the picture below.
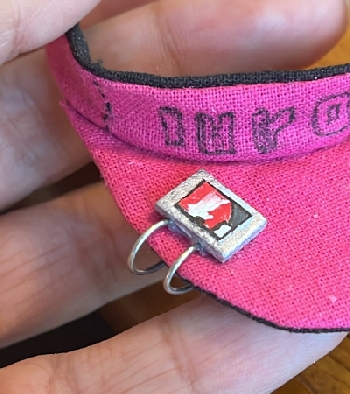
At this point I had to figure out how I was gonna make that tiny metal . . . attachment thing, that goes on the right side of the hat.
I ended up just using a piece of foam cut to the right size then painted with metallic silver, then I literally just drew the logo on a piece of paper and glued it to the top.
For the rings, I had to poke holes through the hat itself which wasn't hard at all considering it was cardstock. Then I just glued the foam piece ontop to hide the holes.
For the Zink logo text, I just sketched an outline with pencil then went over it with pen. I considered tracing the whole thing with pen for the details, but it didn't work out well so I just went over it with black paint.
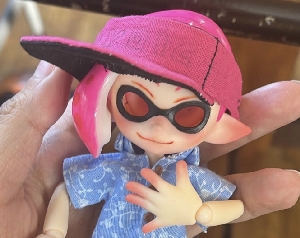
Finally, I could put him together. But, he isn't done yet.
The eyes FINALLY arrived. Putting these together was extremely simple. I just painted on the inside then glued the clear part ontop.
But because I wanted to be extraaa, I spent 3$ on a tube of pink glitter only to use the tiniest bit of it inside the eyes. And now they shimmer!
I also made completely black versions of the eyes and painted less/more-than symbols on them, so he can blink or wink.
And now, for the moment you've all been waiting for.
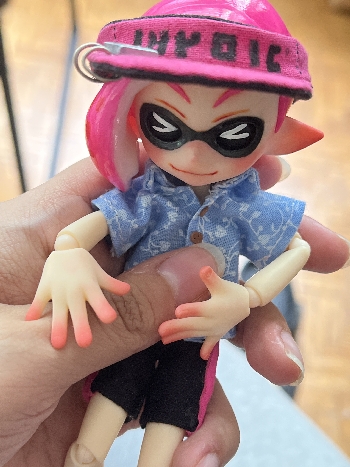
Now that he's done, there are a few things I'd like to change in the future.
For starters, I need to re-do the shirt. It's way too short for the male body.
I also found an artist on Twitter who made an Aloha plushie (super cool btw) and noticed they used the correct fabric for the shirt. They were able to tell me where to custom print fabric, which I might get in the future. I'm also not happy with the collar of the shirt.
God, sewing at such a tiny scale is hard. I wish there were more 1 :12 patterns that fit Azone dolls, so I didn't have to make them completely from scratch.
Since I looooove spoiling dolls, I made a lot of accessories for Aloha.
The first thing I decided to make was a Squidphone. I just downloaded the file from the game and had to modify it a bit. Because the screen itself is a flat texture, I had to add a slight indentation for when I 3d printed it.
(If you want to make your own, you can download my version of the model here)
For the inside of the screen, I painted the inside black and used a small strip of white paper for the bottom so I didn't have to deal with masking off a bit of white. Then I poured some of that clear glaze into it to make the screen shiny.
I was originally going to create tiny charms for the phone, but considering the scale, I wasn't able to work with such tiny pieces. At first I attempted to make shrinky-dink charms, but they were just too small I ended up snapping them when trying to attach them to a loop.
Clay was my second option but I don't think I'd be able to make such tiny tiny shapes. Maybe in the future.
Oh, remember the inktank I mentioned earlier? I just painted it the correct color and then poured some glaze over it to make it shiny. I drew on the black and red indicator lines with paint.
I also wanted to make him somewhere to sit, but considering a chair seemed too difficult for the time being, I settled on a bean bag. Which was very easy to make.
I just drew two circles and then a long strip that tapers on the ends (so it slounches towards one side), then sewed the strip between both circles.
I stuffed it with a little bit of polyfil and the rest just rice to weigh it down since I didn't have proper beans.
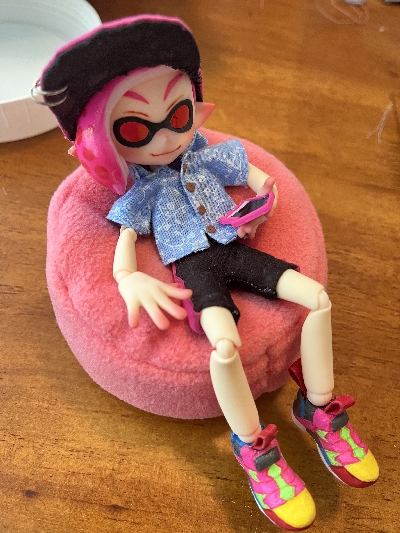
Now he has a place to sit, and something to do to pass the time.
If I decide to make more accessories/furiture for him in the future, I'll update this entry. Thanks for reading this far !