
Now that we got the basics out of the way, we'll actually dive into creating our first website!
So, first. You're going to want to create a folder to house the entirety of your website, like the example I gave earlier. It doesn't really matter what you name it, because as the root folder, you'll only specify the relative path when referencing it.
If you're using Neocities, it should provide you with a few files to start. That being index.html, not_found.html, and style.css
These three are essential for creating a website.
Depending on the hosting service you're using, not_found.html may be named something else. But that's what its called on Neocities.
The first page you'll work on will be index.html. This is basically the homepage of your site, what visitors will see when they type in your-website.com.
Whether or not you want to use it as your main page is entirely up to preference though. (I personally did not)
So, when you first create an HTML document, you'll need to tell the computer that it's an HTML document. You can do this by typing in:
<!DOCTYPE HTML>For the next part, just repeat after me... it doesn't require much explanation other than the fact that all HTML documents contain the following in order to work correctly.
<!DOCTYPE HTML>
<html>
    <head>
    </head>
    <body>
    </body>
</html>
Now... what does this mean?
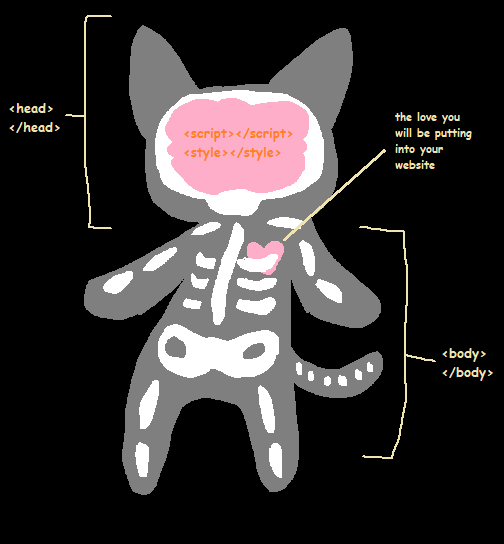
Well, an HTML document is structured like a person! The head contains the information about the document itself (such as the styles, scripts, information for search engine and embeds, etc) while the body contains the actual content of the page; what's visible to the viewer. You will mostly be working in the body.
So, the code provided above is a basic template you'll be using for all of your HTML pages.
Remember the order! (the head is never below or inside of the body)
Before we start filling it with content, I think it's a good idea to brainstorm how we'd like to layout our page. For this tutorial, we'll be creating a simple two column layout with a navigation bar. But the stuff you'll learn can be applied to any layout.
For me personally, I like to make a quick mockup of what I'd want the page to look like on something like MS Paint. You can use actual paper for this though, it doesn't matter, and it doesn't have to look good. Just something quick to reference when you're working on the code.
Your final layout might deviate from the original plan, but that's all part of the artistic process!
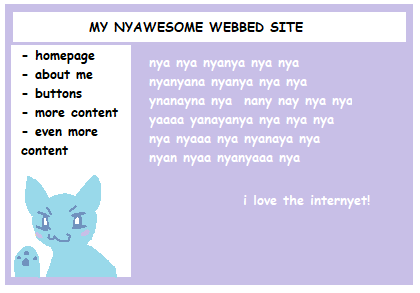
Obviously making a mockup is completely optional. I just find it easier to visualize the general layout without having to worry about redoing the whole code if you change your mind on the placement of something.
First and foremost! We'll have to create a box to hold everything.
In HTML, a container (or a "box") is called a <div>. A div is an element which has no style attached to it... at least not yet.
<div>s are quite literally a blank canvas, and you can paint it to be whatever your heart desires!
Now, you may be thinking; "Why do I have to create a container, why can't I just place all my text and images directly into the body?"
Well, you're technically free to do this. After all, that's how most websites were made in the early days of the internet. But, doing it this way makes it harder for customization down the line. This is especially true if you're going to be hosting lots of graphics on your page.
A big mistake I find beginner coders making is throwing everything inside the body and designing their webpage for their monitors resolution, but viewing it from another device shifts everything apart! We don't want that.
So, in this tutorial, we're going to create what I like to call a "false body". This will be the container that will actually hold everything.
<!DOCTYPE HTML>
<html>
    <head>
    </head>
    <body>
		<div class="falsebody">
        </div>
    </body>
</html>
Here's a visualization of what we're looking at:

If it wasn't obvious, there are no styles assigned to these tags. So viewing the actual document will be completely empty, or "invisible." But trust me, they're there.
So, let's assign a style to it!
Now, there are multiple ways to create the style (or rather, CSS) for this div.
That being internal, external, or inline.
I'll explain inline first. Inline styles are best for when you have a single element you want to style with one or two properties. Properties are basically the style rules. For example, the background color or the size of text.
Inline styles are written directly in the tag. An example of inline styling would be:
<div style="background-color: red;">
</div>
Obviously, this can take up a lot of room if you have more than a couple style properties. We can make this easier to look at by assigning the div a class and moving the properties somewhere else in the document.
Remember earlier when I mentioned how the head stores the information? This is where the style will be kept internally, and to do so, we use the <style> tag.
<head>
	<style>
	   div {
	   width: 400px;
	   height: 300px;
	   background-color: red;
	   }
    </style>
</head>
...but what if you have a huge page with dozens of different classes spanning hundreds of lines. That's going to take up a lot of room in the document. And what if you want to have multiple pages that share the same styling?
This is where external styles come into play.
Inside the head, we could instead tell the document to reference an external CSS file that stores all the styling, rather than using the style tag.
<link rel="stylesheet" href="style.css">Inside this CSS file, the formatting will be the same as what's inside the style tag.
The anatomy of a CSS file:
Declare the element name or class (the selector), then two curly brackets will contain the list of properties and their values. Properties are separated by semicolons, yes even the last one in the list.
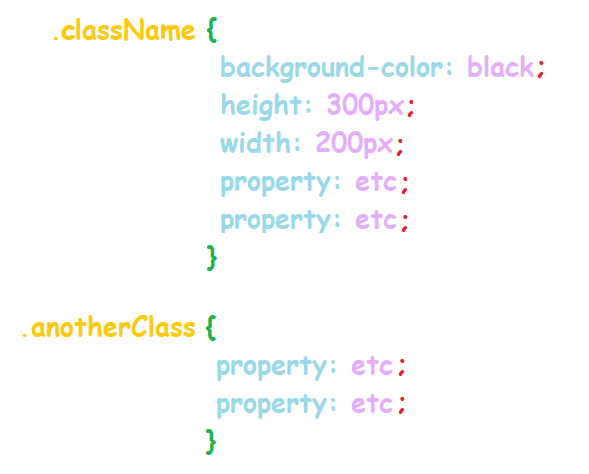
There are no exceptions to this format. It's really that simple.
In the above example, I used class names. However, you don't need to assign a name to everything you want to style.
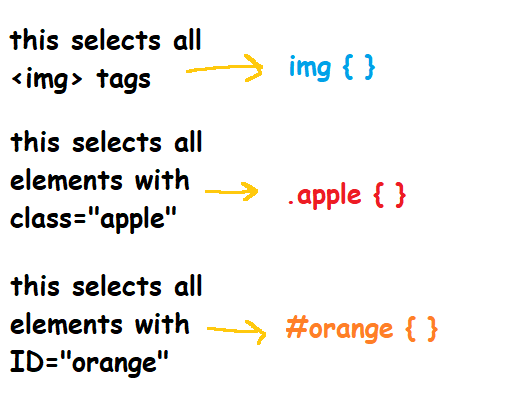
For instance, if you want to style all paragraphs (<p>) you simply type p. No dots, no brackets, just the element by itself.
If you want to style a specific class, you will type a period followed by the class name. So, the class "aClassName" will become .aClassName
And finally, for IDs you will type a # symbol (does anyone really know what this is called) followed by the ID name. For example, the ID "IDname" will become #IDname
We will talk more about IDs in the future, but they're not important right now.
Please remember that selectors are cAsE SeNsiTiVe
(basically, the class ".cat" is different from the class ".Cat" and ".CAT")
To assign a style to our "false body" div, you'll need to assign a class to it.
Because I am so generous, I already assigned a class to the div in the code snippet I provided. That being "falsebody," but you can rename this to whatever you'd like.
Everything with the same class name will be assigned the same style.
If you're following this tutorial exactly and are creating a false body (which I highly highly recommend) we're going to have to style this false body to function as a container for our actual content.
This is where the mockup comes into play, and why I personally like using them.
With mockups, you can visualize how big or small your website is going to be. You can create this in exact pixels (if youre doing this digitally) and then reference those sizes when actually coding it.
For the example in this tutorial, I want the whole webpage to appear a maximum of 800 pixels wide. So, we're going to style our false body to be 800 pixels.
So far, my code looks like this. But depending on if youre following the tutorial word for word or not, yours might have different values.
<!DOCTYPE HTML>
<html>
    <head>
		<style>
		.falsebody {
		width: 800px;
		}
		</style>
    </head>
    <body>
		<div class="falsebody">
		</div>
    </body>
</html>